
Today, I’m showing off a really fun project that we recently completed for a client. We added some custom barn doors to a built-in entertainment center in their living room. You won’t believe how much character these doors added to their space!
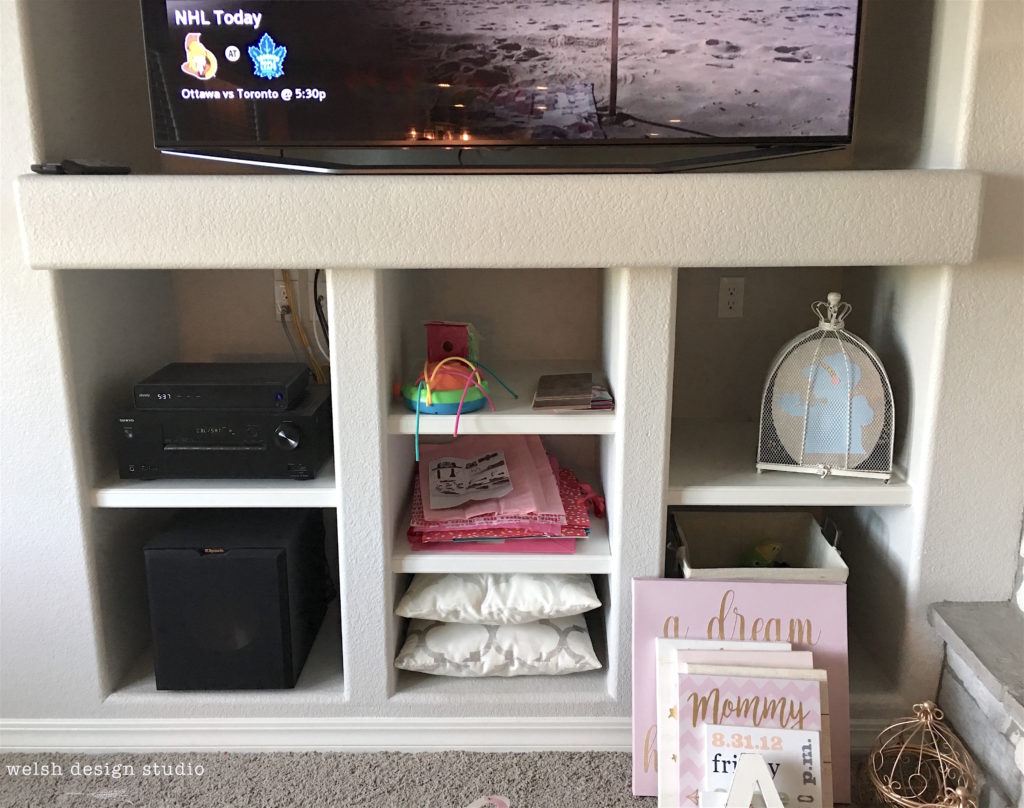
Here is the before picture of the entertainment area. They had some great built-in shelving under the TV, but wanted to hide the electronics and plugs and wires from view. We came up with some great plans to create a sliding barn door entertainment center.
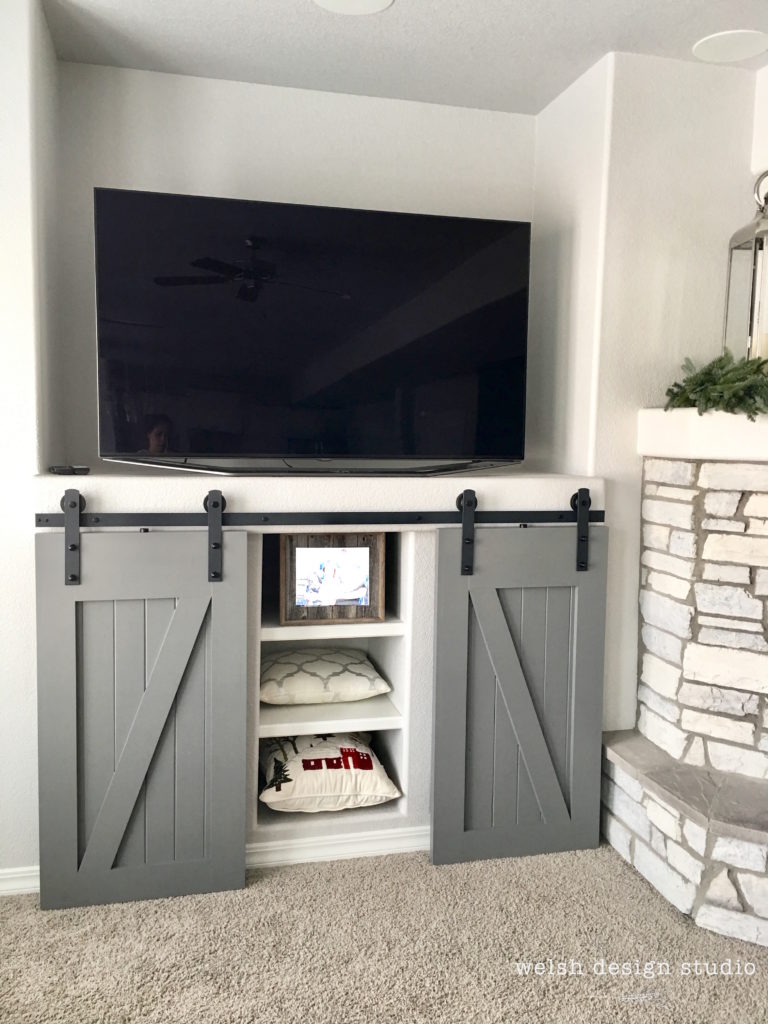
And here is the gorgeous “after” view! I am so in love with this DIY barn door entertainment center that I’ve been daydreaming about places where I can add something like this in my house! Read on for our barn door entertainment center plans and tips.
Barn Door Entertainment Center Overview
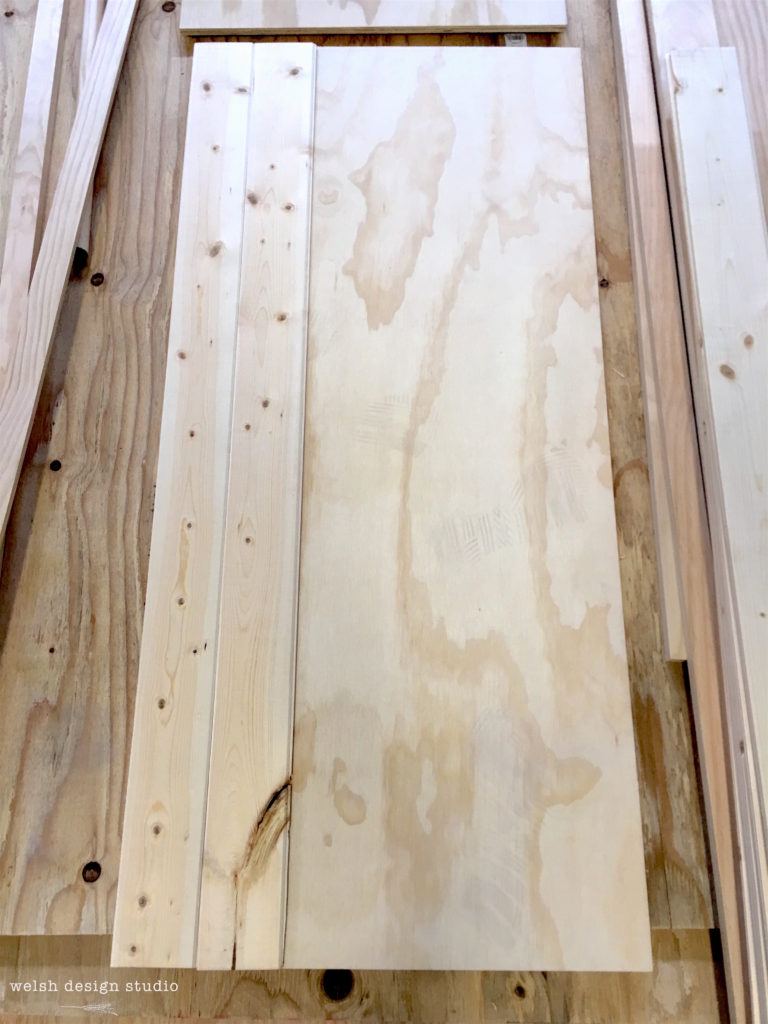
Making the entertainment center barn doors was pretty simple. We purchased one 1/2 inch 4’x4′ plywood sheet and cut it to our desired size. For the planks, we purchased one box of ceder planks from the Home Depot. Each box contains six 6-ft planks. Expert Tip: check the boxes before you buy to make sure you aren’t getting too many damaged planks in your package.
We cut the planks to size and adhered them to the plywood using wood glue. We weighed the planks down with all sorts of things from our garage while they dried to ensure they set correctly (nice and tight to the plywood). Our planks didn’t go all the way to the right and left edges of the plywood, but that was ok because we would be adding some 1×4 trim around the edges, which would hide those “gaps.”
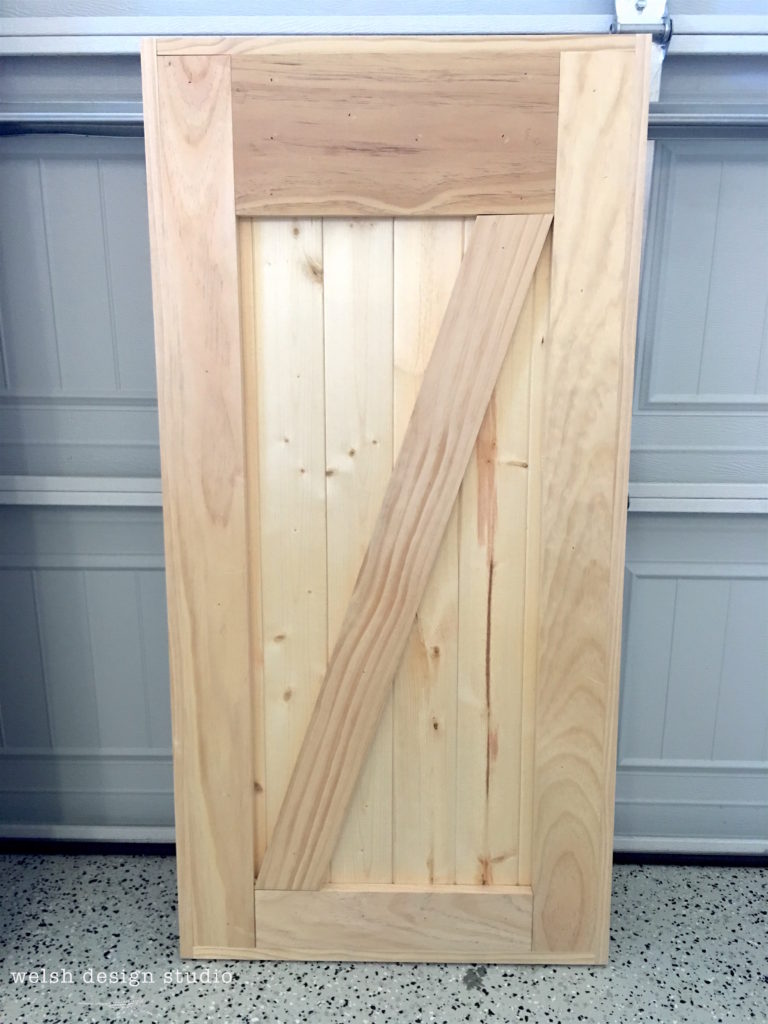
Once the planks had time to set, we added 1×4 trim around three sides of the door. Next came the 1×6 piece for the top of the door. The 1×6 was important because the barn door hardware needed the extra height for attachment. We then cut a diagonal cross piece, which took a little math (and trial and error) to get the correct angles. All of these were attached with wood glue and nails.
Barn Door Trim
Finally, we added 1×2 trim around the edges of the doors so that there would be a nice clean view from the top and sides. The 1×2 trim is the perfect width because the barn doors were built with a 1/2 inch of plywood, 1/4 inch of plank, and 3/4 inch of 1×4, which adds up to a door that is 1-1/2 inches deep (same width as the 1×2). The barn door hardware also requires that your door thickness be right around 1.5 inches, so that’s how we designed it. Here is our finished barn door, before any filling, sanding, or painting!
Painting & Adding Barn Door Hardware
After doing some sanding of any high points, and filling all the nail holes and little gaps, we primed the doors. Next, we painted two coats on each side using Sherwin Williams Westchester Gray in a satin finish. It’s such a beautiful medium-gray, and worked perfectly in their home.
The barn door hardware came from Wayfair. We used the Classic Straight Strap Sliding Door Track by Calhome, and then purchased two additional single rollers for the second barn door. The hardware was easy to install, with the hardest part being the need to convert millimeters into inches.
The track and barn doors installed easily, and our barn door entertainment center was ready to use!
I just love the way a small change, like adding these finished barn doors, can add so much charm! We also did a gorgeous mudroom for this client, with a wood herringbone backsplash, which I will be sharing soon, so stay tuned…


Love these! It’s amazing how much they upgrade the space.
These are amazing. I love them
It is gorgeous! thanks so much for sharing for sharing on craft schooling sunday!
I love the doors and the color. It’s perfect or a farmhouse style home too. Thanks for sharing on Sunday’s Best.
Love, love, love. Such a beautiful way to hide all those unsightly bits. It’s just gorgeous
Hello! Thanks for sharing this post at Thursday Favorite Things. I will be featuring you on my blog at tomorrow’s party. Hope to see you there!
What kind of wood did you use for the trim? I just spent about $250 and have a feeling I could probably choose a different material. Thanks
Wood is very expensive right now! We used 1×2 select pine for the trim.
Thank you so much! Starting this weekend, but messed up and got 3/4 plywood so trying to see if there’s a a board wide enough to cover all around.