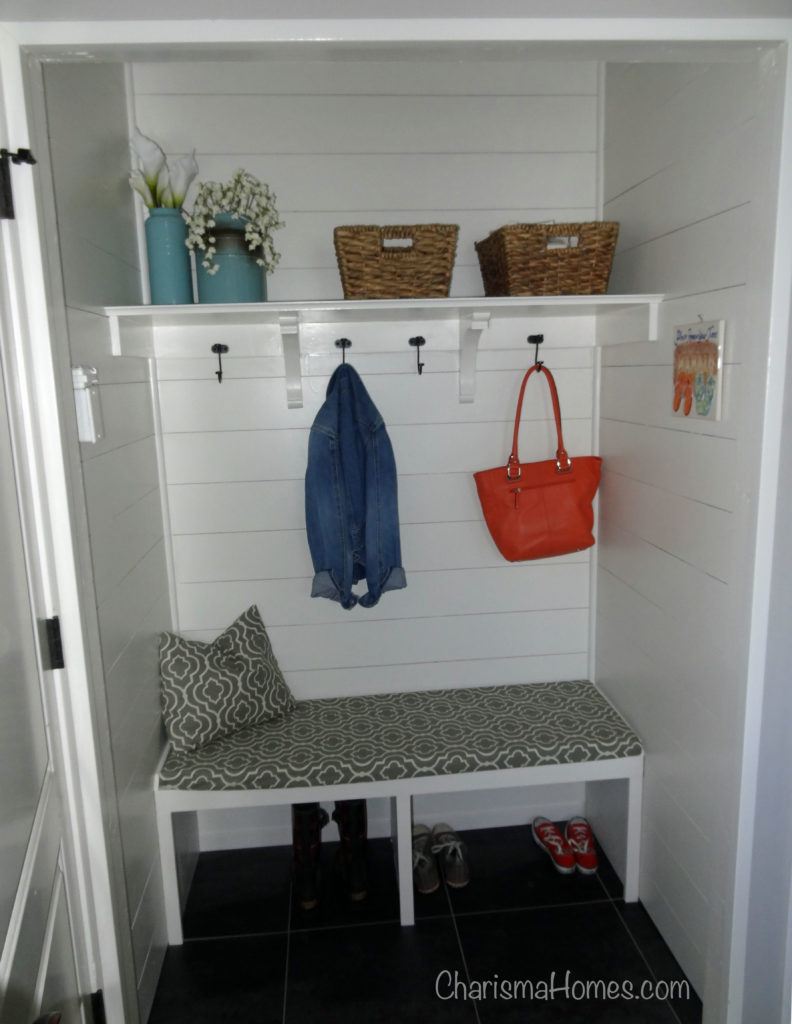
We finally finished the mudroom closet! Hooray! OK, well, it’s actually been done for a couple of weeks now, but I just didn’t find the time to stage it and make it presentable for pictures because we were too busy throwing our stuff all over it (basically, we were using it the way it’s supposed to be used).
Mudroom Closet – Finished!
It all started with the removal of the water heater and furnace. They had been occupying such valuable space in our home, and they were really old and inefficient. We’re very happy with the big HVAC upgrade we did in the house, by the way, but that’s a topic for another post. Here is the before picture.
Mudroom Closet – Before

I had some big plans for this whole laundry space, but then the much more affordable solution to create a mudroom closet came upon me one night, and I started looking online for ideas (which you can read about here). You can also see our progress along the way in a few other past posts (here, here, and here).
We made the top shelf out of 3/4 inch plywood, and attached a piece of cove moulding on the front edge to give it a cleaner look. We installed the shelf on top of 1×4 cleats, and corbels (from Home Depot). The entire space is painted with Benjamin Moore’s White Dove in Satin (my favorite white trim paint).
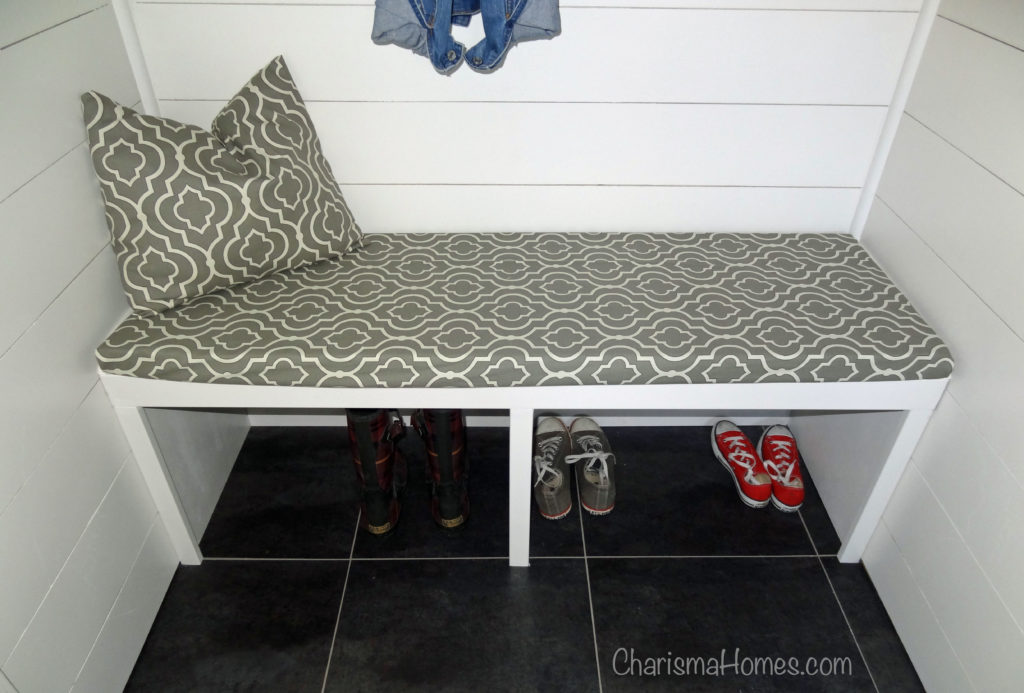
The Bench Cushion
I created a bench seat cushion using a big piece of 2″ thick foam from Joann Fabrics. That stuff is not cheap, so it’s best to wait for a sale, which 4th of July weekend provided. I used a durable outdoor fabric, and created an envelope-style cushion cover. There is a nice tutorial for how to do this type of cushion cover from the C.R.A.F.T website. I like to use this method for all my cushion covers because it’s so easy to do, and therefore so easy to change them later (for holidays, or when you just get tired of them). I had a little fabric left over, so I used it to cover one of our old couch throw pillows.
The hooks were purchased online (Amazon.com). Because we used a 1×4 rather than something wider like a 1×8 under the shelf, we needed hooks that would hook downward, instead of upward. I was originally concerned that we’d made a big mistake with the 1×4, but once I saw the downward hooks and they were installed, I absolutely loved how unique they looked, and these particular hooks are really solid.
We’re so happy to finally have a space to throw our shoes, jackets, backpacks and purse. I firmly believe everyone needs a space like this in their home, especially if you’ve got kids! It could be a dedicated mudroom, a well-organized closet, or just a nice bench and some hooks in your entryway.
See this and other great projects at Thrifty Decor Chick!

Do you have the plans and measurements you used when building your mudroom?
Sorry, no. Our plans were just sketches on paper at that time. 🙂