Have you ever walked into one of your rooms and thought, “wow, this room needs a makeover”? Well, that’s what happened to me one day, and we’ve been working away ever since to update the room and create a fabulous custom built in dining room hutch. Here’s a pic of our dining room before the makeover. That’s my son writing an apology note to his teacher for some bad behavior…a whole other post.
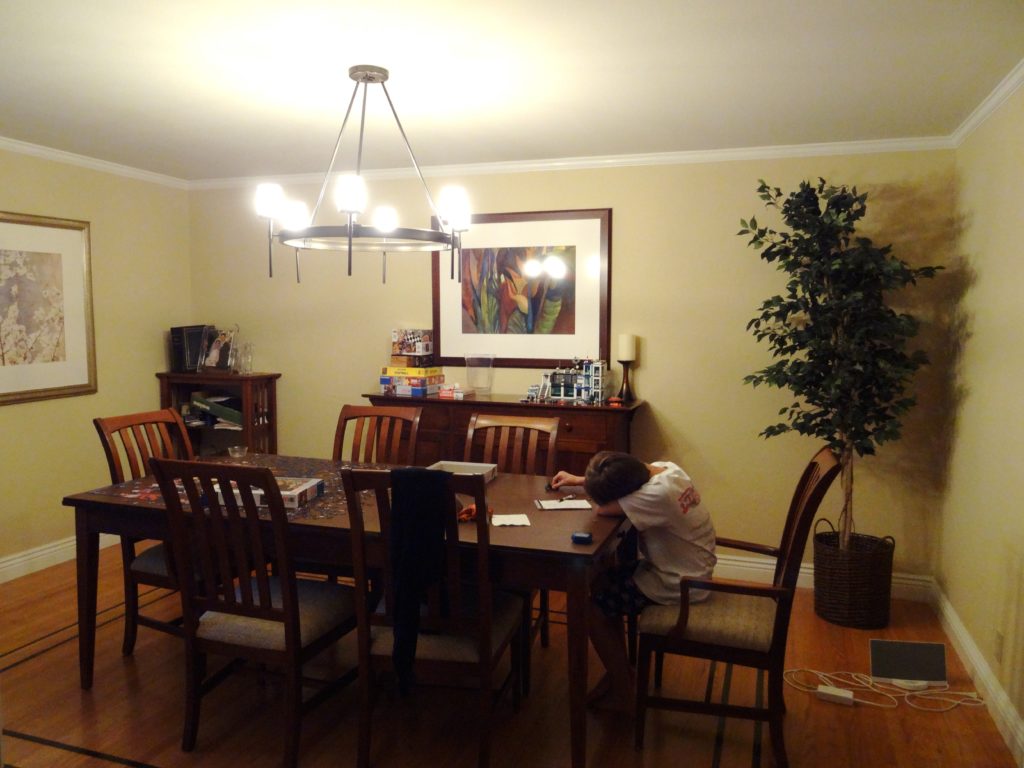
Dining Room Makeover (before)
Now, don’t get me wrong, our dining room is a nice big space and there’s nothing really wrong with it, but it is lacking that special quality that makes you want to spend a lot of time eating and entertaining in there. Plus, we were in desperate need of some storage.
So, what gives a dining room special character and charm? To me, one of the best ways to add character to any space is with built-ins and wainscoting. Yep, that’s exactly what this room needs! Wainscoting gives a room that beautiful detail that makes it feel special and elegant. Built-ins not only provide tons of storage, but they add a focal point to an otherwise bland, rectangular room.
So, we created a custom built in dining room hutch by adding some base cabinets, a granite countertop, and some upper cabinets on the long wall. Then, we added board and batten wainscoting to the entire dining room. The transformation was stunning! The white wainscoting and cabinets not only added tons of character, but they completely brightened up the room. Now we’re talking!
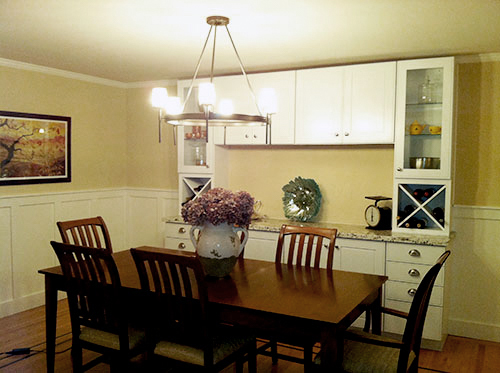
Dining Room Makeover (after)
The Board & Batten Wainscoting
To add the wainscoting, we first had to tear out all our our baseboards, and replace them with some simple 1×6 primed pine. The reason we did that was to make sure that the 1×4 vertical stiles we would soon be adding would marry up with the baseboards, without hanging over them. We used 1×4 MDF for the vertical stiles and header board, and some 1×2 MDF for the top rail.
We initially installed the wainscoting pieces directly to the wall (see pic below), thinking the wall was smooth enough that we could just paint it all white and be done with it. However, once the first coat of paint was applied, I knew we had made a mistake. That’s DIY for ya!
I went back and floated a mixture of joint compound and water (“skim coat”) in each panel space, creating a perfectly smooth finish. It took forever…and a lot of patience…and I vowed never to do it again. Lesson learned. Some primer, and more paint, and finally the wainscoting looked like I had envisioned from the start.

Installing the Built In Hutch
The built in dining hutch cabinets are Kraftmaid. We sketched out our own built-in configuration and then worked with one of the designers from Home Depot to order. For the installation, we figured we could do it ourselves, which honestly ended up being a little more challenging than we thought, but saved us some money.
We installed the base cabinets first, and then had a local company install a pre-fabricated granite countertop. Then it was time to install the two wine cabinet units and the wall cabinets in-between.

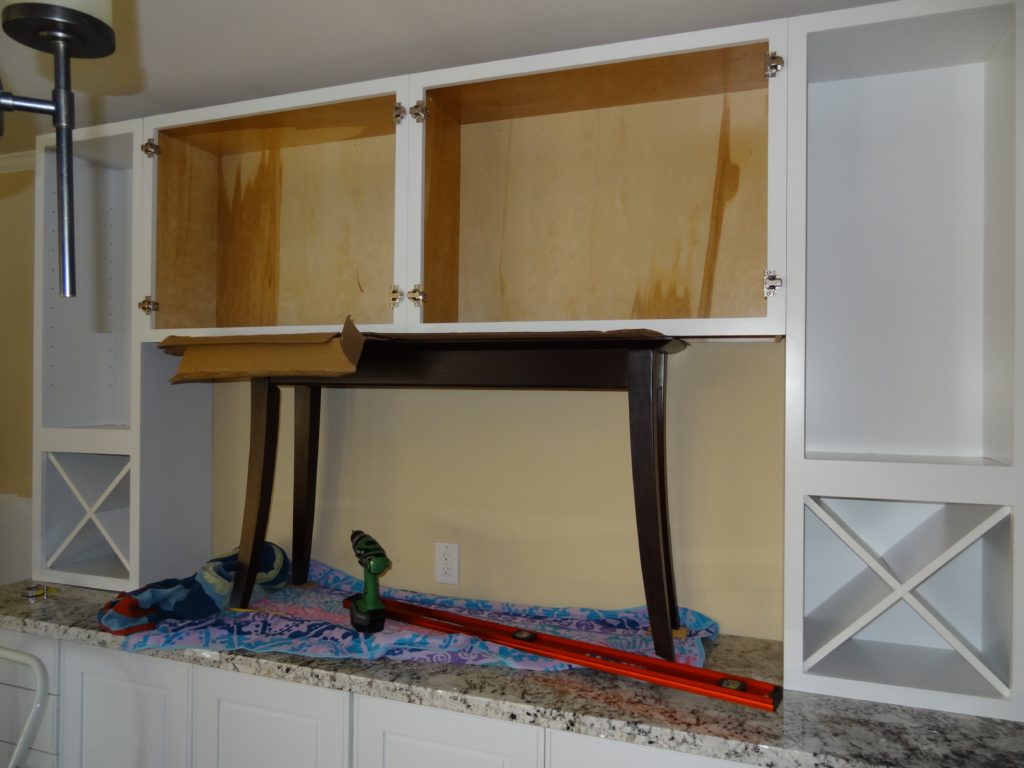
Like all houses, our walls were a bit crooked, and we tried several times (unsuccessfully) to mount the wine cabinets from one side to the other…always ending up with cabinets that didn’t meet in the middle or at the end. Super frustrating!
Finally, we came up with a “custom installation mount” which is a fancy way of saying we took our console table (which happened to be just about the right height) and put it on top of the countertop, and then rested the wall cabinets on top of the console table so we could get them installed all at the same height. I’m sure there was an easier way, but when you have your mind set on doing it yourself, you often have to get very creative.
Finally it was installed, and we absolutely love our new built in dining room hutch. All we have to do now is put in a few trim pieces, add the crown moulding, and maybe paint the room…oh, and fill up those wine racks for our next party, ‘cuz this room is ready for some entertaining!
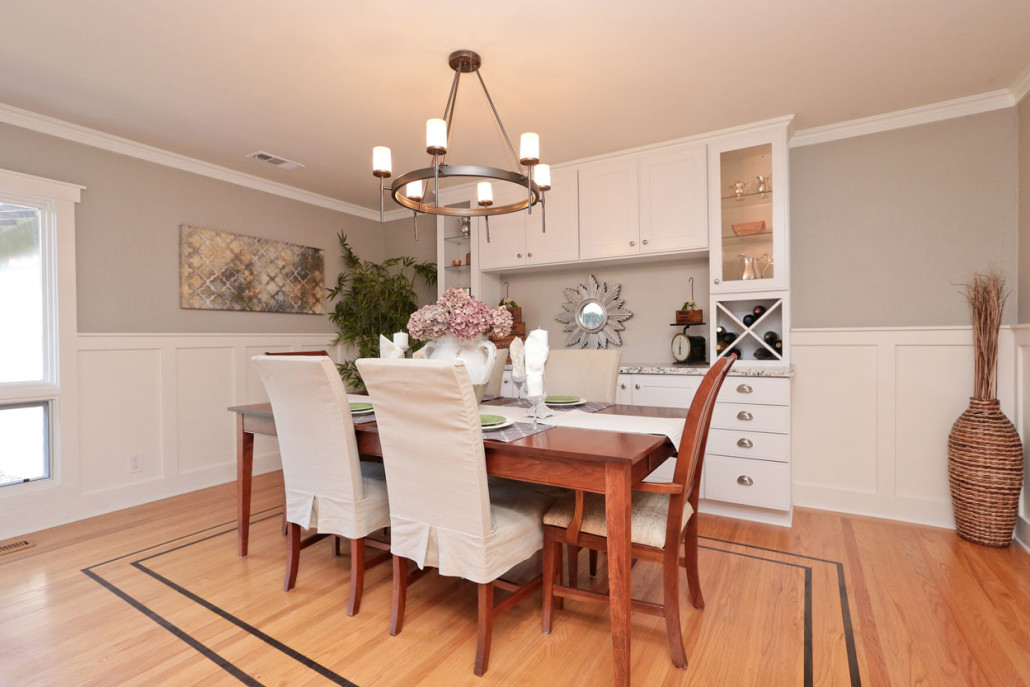
Post update: This is what our dining room eventually looked like before we sold the house in 2016. You can read more about our dining room updates here and here.

Love this. Great information!! Thank you!