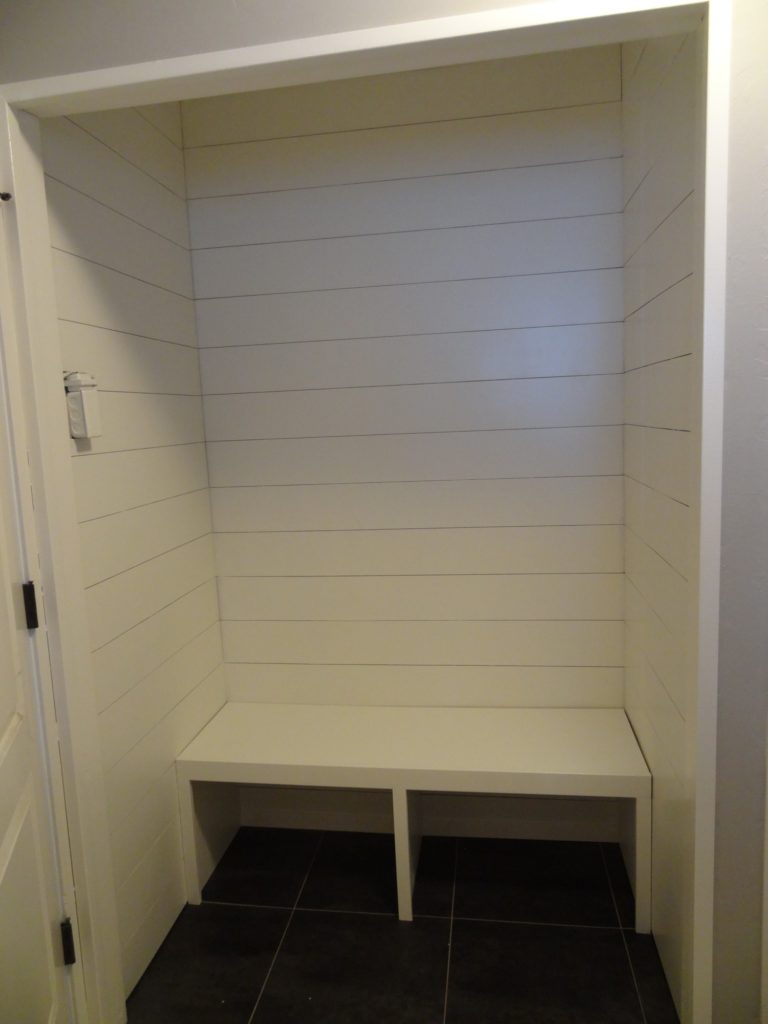
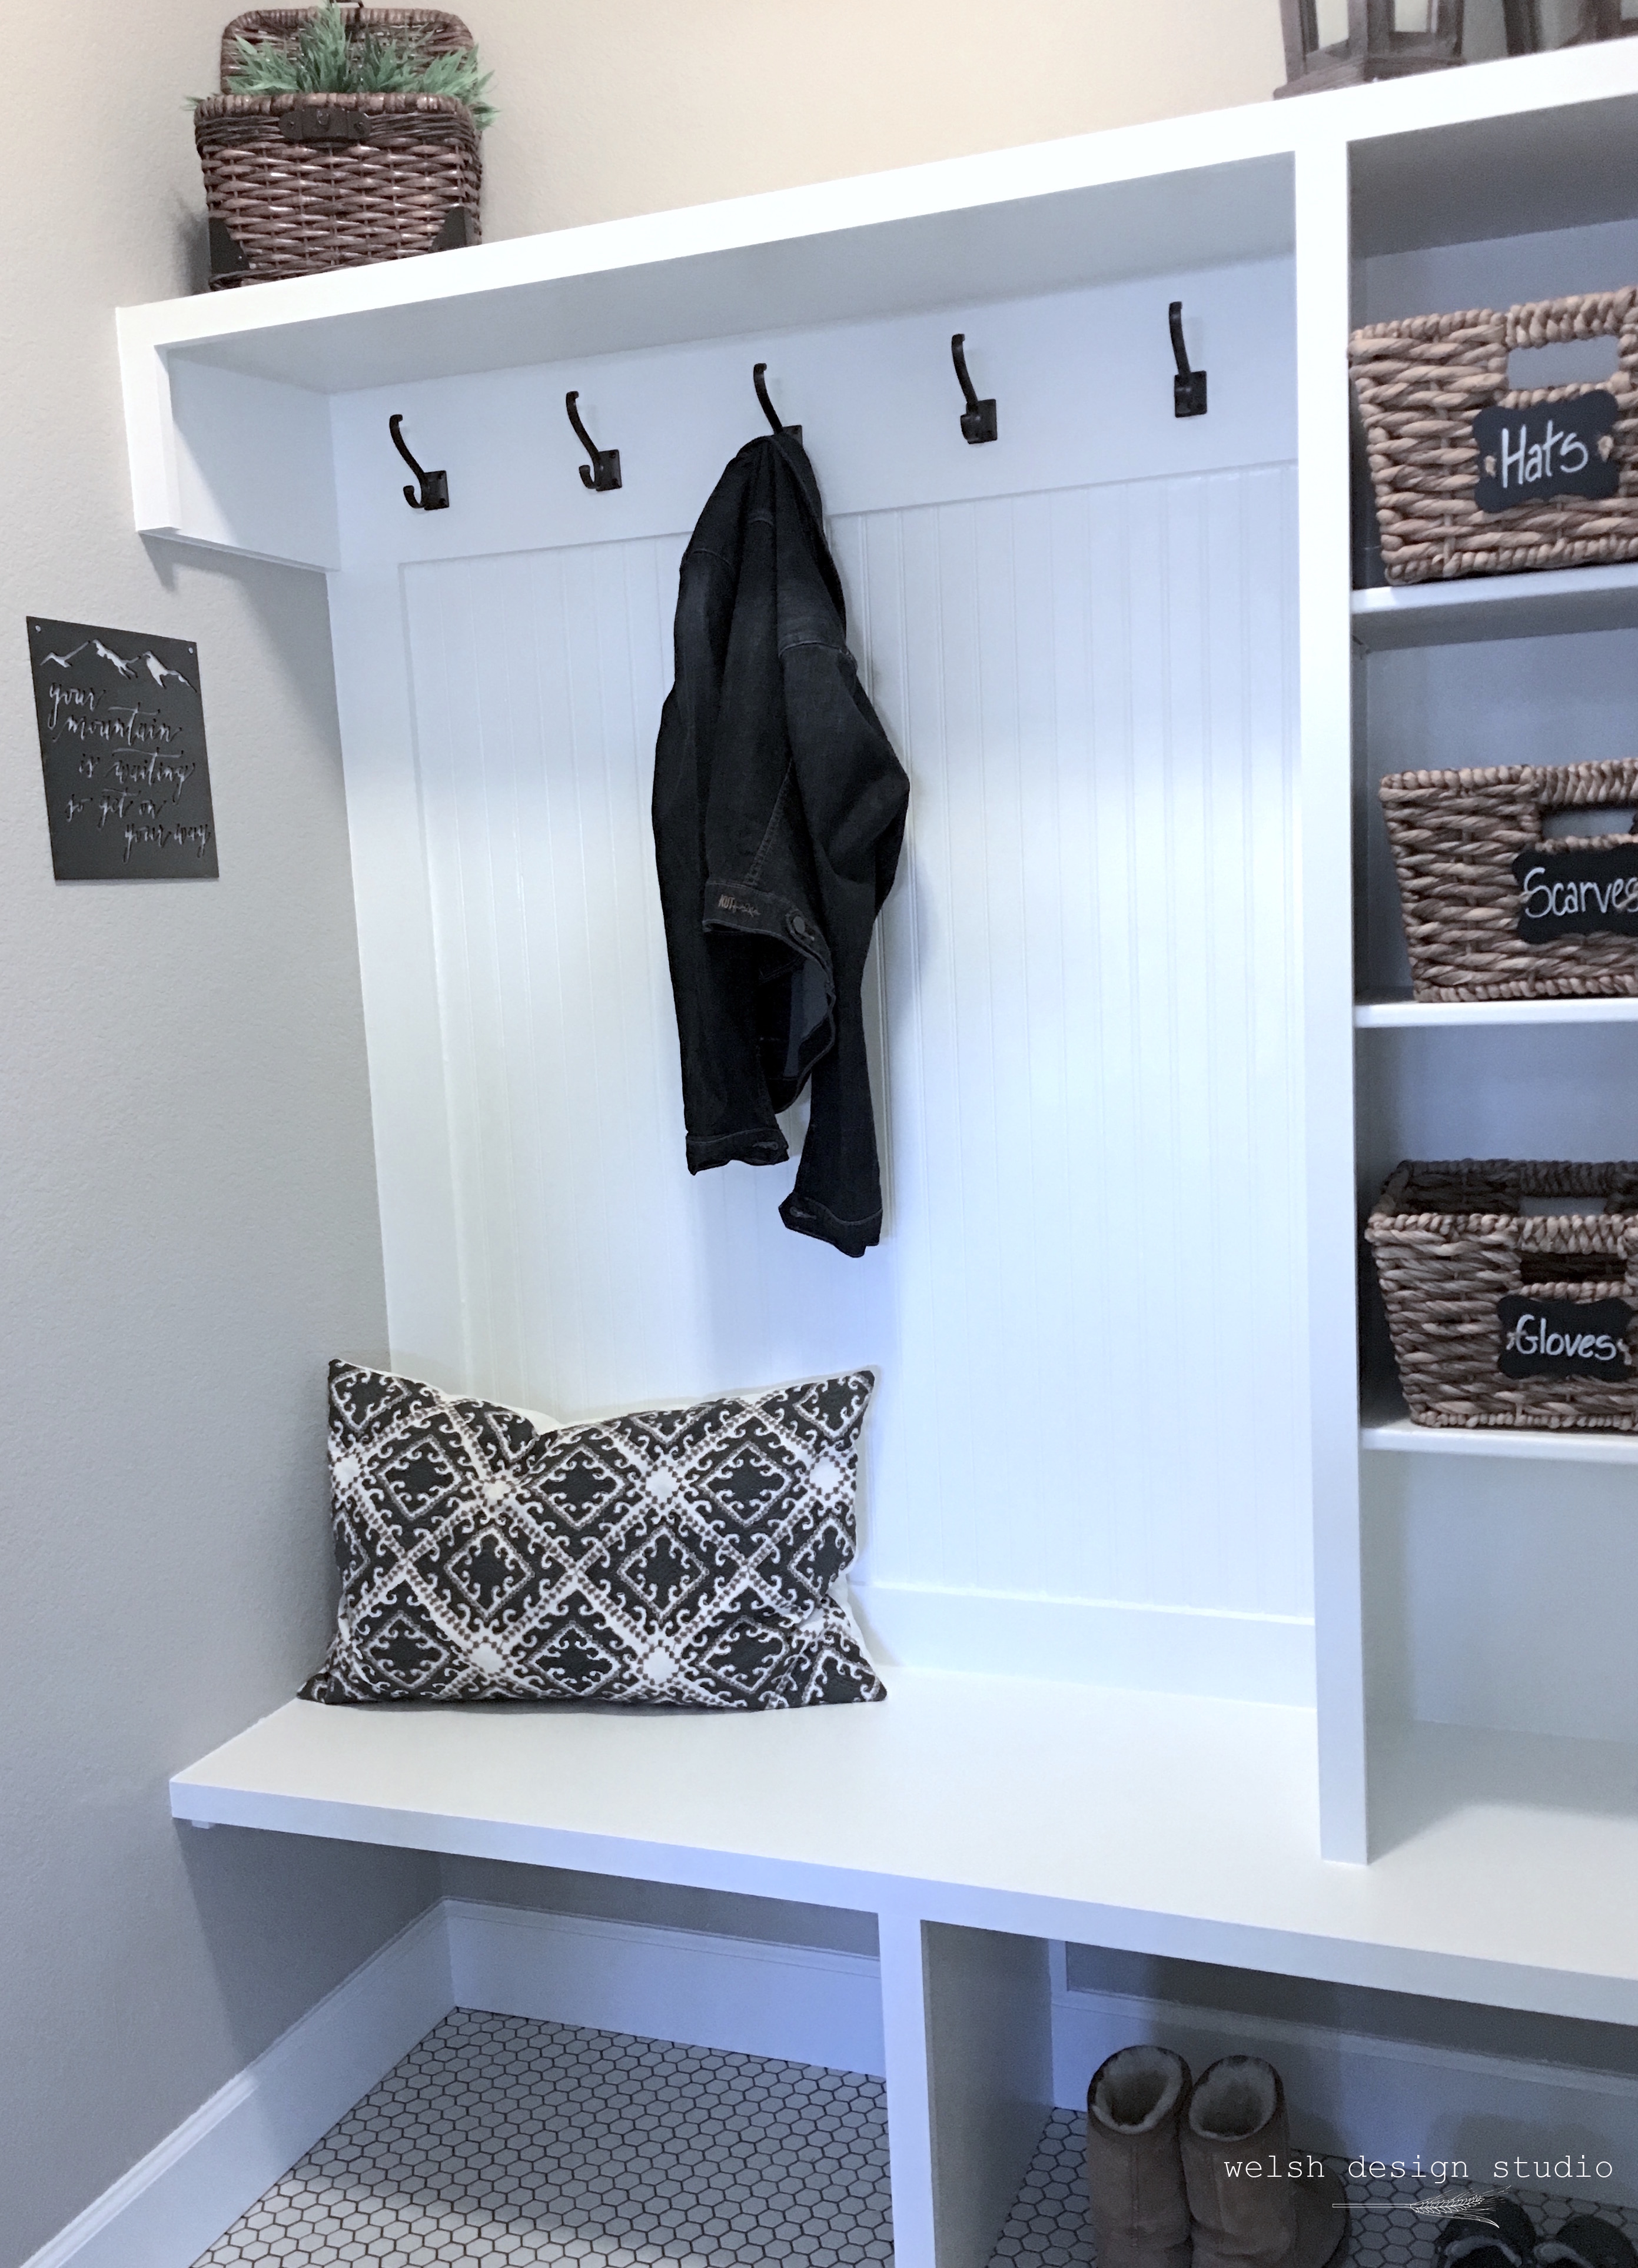
We’re making slow but steady progress in our mudroom closet! To catch you up to date, we have already installed the flooring and plank wall. This week, we built a mudroom bench and installed it into our little space. Here’s what we did…
Mudroom Bench Construction
To build our mudroom bench, we borrowed and tweaked a very simple design from Ana White (see diagram below). We decided to keep the bottom of our mudroom bench open to the floor because, well, our family needs to be able to kick off their shoes into a space without having to open a drawer or pull out a basket. Although baskets or drawers would look beautiful, that just wouldn’t work for our family.
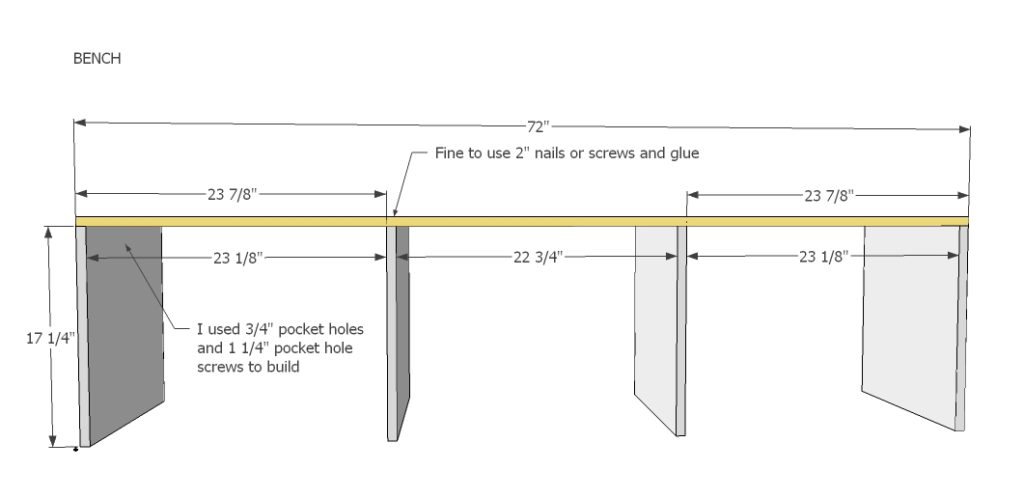
We used 3/4-inch plywood, and cut it into a bench top and three vertical bench supports. We used pocket screws to attach the sides to the bench top, and nails for the center bench support.
Installation & Trim
Once the bench was assembled, we primed and painted it white, and then placed it into our mudroom closet space. It fit beautifully! We will be covering any small gaps with trim later on.
Next, we cut some 1×2 trim pieces to size and installed them on the front of the bench seat, and vertical support pieces for a nice clean finish. It’s really starting to come together now!
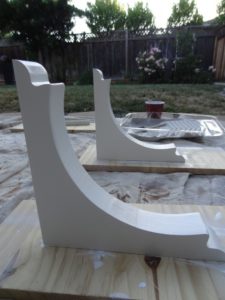
Next, we’ll be installing a rail with hooks on it, and a shelf “supported” by some decorative corbels. Here’s a picture of the corbels being painted. They are gonna look really cute once they are installed!
Leave A Comment