Is your hallway lacking pizzazz? Maybe you’ve never even thought about it, as you walk down the hall every day, but what if you could add something to elevate it to a whole other level? I’m talking about wainscoting! Today I’ll share with you how we took our bland hallway, and gave it beautiful character with some wainscoting!
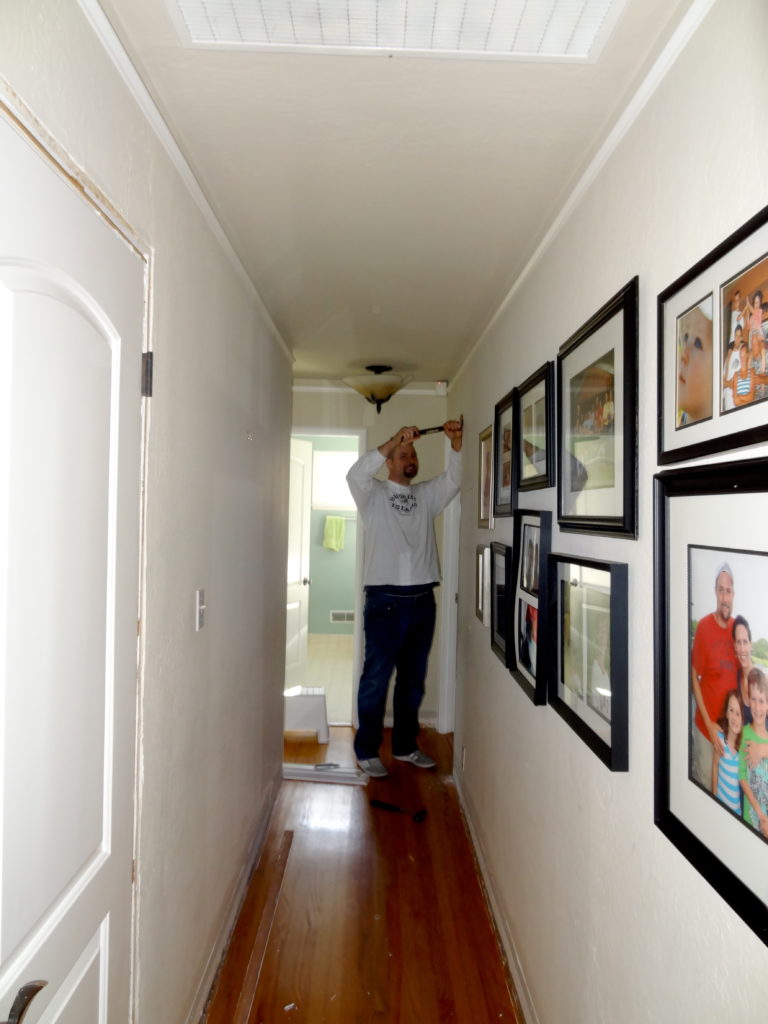
Here is a picture of our hallway just after we started demolishing all of the baseboards and door trim. Now, you don’t have to take off your door trim to install hallway wainscoting, but we wanted to change the style of our door trim while we were at it.
We love craftsman style, and we also love board and batten wainscoting! If you’re not familiar with “board and batten,” it is a style of exterior siding that is also used on interior walls to add visual interest. The “battens” are the vertical pieces of wood. The “boards” are large flat panels that can be used to create a smooth backdrop, if your walls are textured.
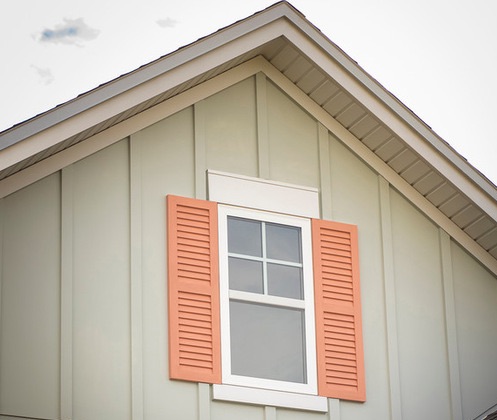
External Board and Batten Siding
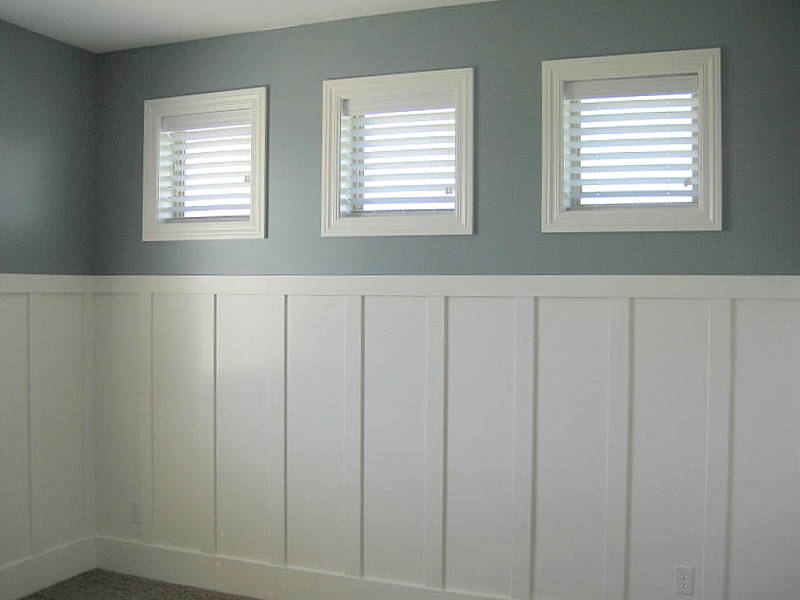
Interior Board and Batten Wainscoting
WAINSCOTING TUTORIAL
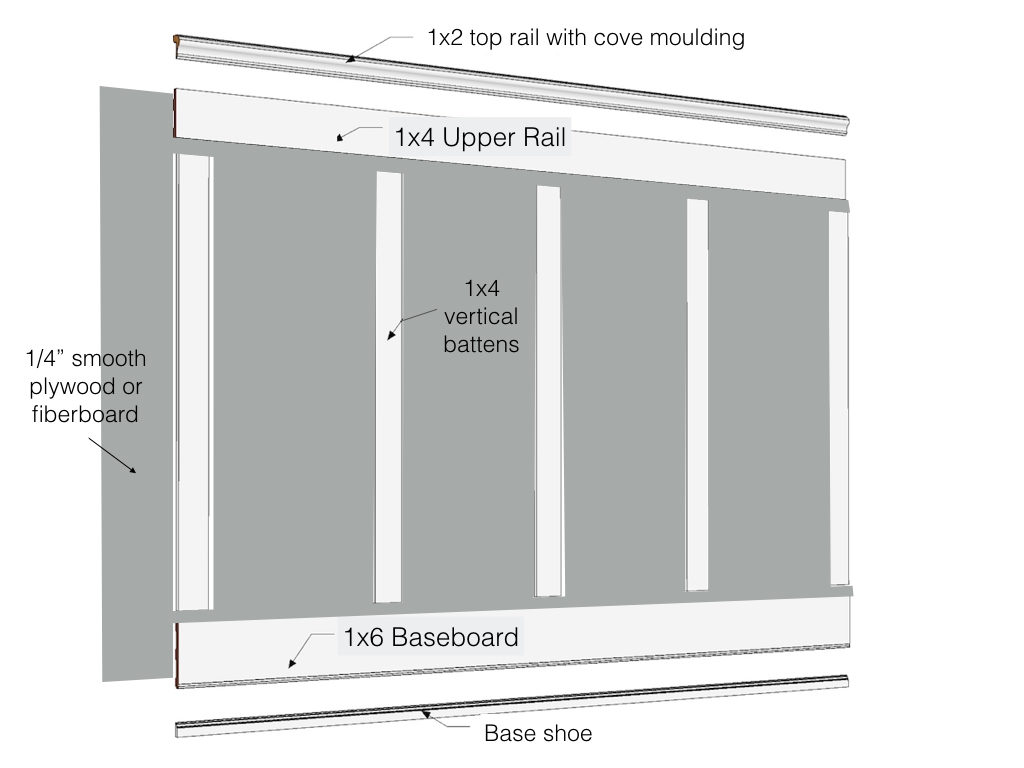
OK, so here’s what you need to do to transform your hallway with some gorgeous board and batten wainscoting. Here’s a diagram to get you started.
First, think about how high you want your wainscoting to go. We chose to end ours just under our light switches, or about 42″ high. You may want to go higher or lower than this, depending on your preference.
- Remove old baseboards. You may not need to do this step, depending on your existing baseboards. One option is to cut your vertical battens at an angle where they meet the baseboards. I personally don’t like this look as much as when the vertical battens meet the baseboards “head on.” But, it certainly saves some time and cost of materials over having to replace the baseboards.
- Install thin plywood or fiberboard on the walls using construction adhesive and nails. You will have to cut it, or have Lowe’s or Home Depot cut it for you, to the right height for your wainscoting. You will want it to go underneath both your baseboard and top rail.
- Install baseboards. If your baseboards stick out significantly from your door casings, cut them at an angle where they meet the casing for a better transition.
- Install top rail. Use a long level to ensure the top rail is straight.
- Determine ideal spacing for battens.Things to consider are: covering up the seams of your plywood or fiberboard, and how long your wall is. For long walls, you can have a wider spacing, but for small walls, a closer spacer looks better.
- Install vertical battens. You will need to cut them to the appropriate size.
- Install top rail. We used a 1×2 for our cap. We also installed some cove moulding underneath the 1×2 for a more decorative look and smoother transition.
- Caulk all seams and fill nail holes with light sparkling. Once your sparkling is dry, sand smooth and remove excess dust with a tack cloth.
- Prime, as needed, and then apply two coats of semi-gloss paint. The paint we used is Benjamin Moore Advance in White Dove – a great white color for trim. The Advance paint has excellent leveling properties, and dries very hard. The only downside is that it takes a really long time to dry – recoat time is 16 hours. I had to guard the hallway like a hawk in between coats to make sure my kids and our dog didn’t touch the walls.
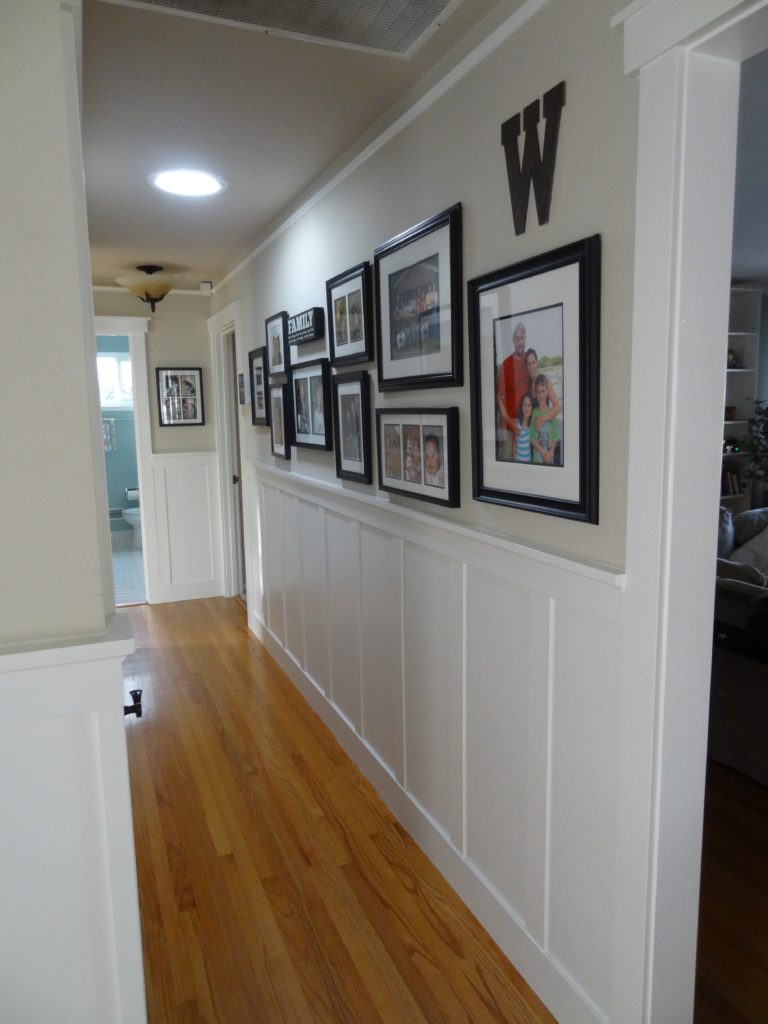
So there you have it! What a difference a little wainscoting makes, don’t you think? It is a great way to transform your hallway from plain and simple, to stunning and elegant. Now, every time I walk down the hallway I smile. 🙂

[…] Download Plan More @ http://www.welshdesignstudio.com […]