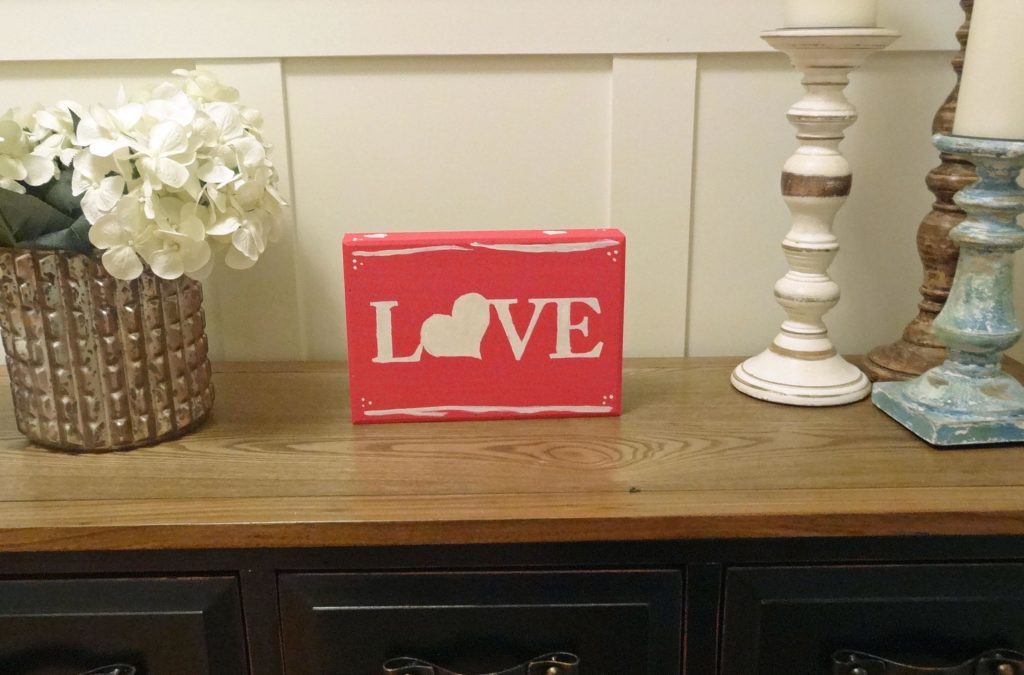
February brings the first decorating holiday of the year…Valentine’s Day! I realized that I don’t have any decorations for this love-ly holiday (see what I did there?), and I felt like I should have something to be able to put out to celebrate the holiday. So, I decided to make a quick and easy DIY Valentine’s Day sign. Seriously, this is the easiest sign to make…no Cricut machine needed! And, I think it took less than an hour from start to finish. The best part? You can use this same process to make it your own!
How to Make the Valentine’s Day Sign
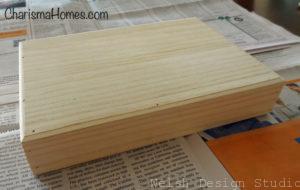
Take a trip to Michael’s or your local craft/hobby store, and purchase an unfinished wood plaque or canvas and some craft paint. I used a 6″x9″ wood plaque from Michael’s, I love these because they can stand up on their own, and they’re very inexpensive. The wood plaque was on sale for about $4, and I had a coupon, so it was only a couple of bucks.
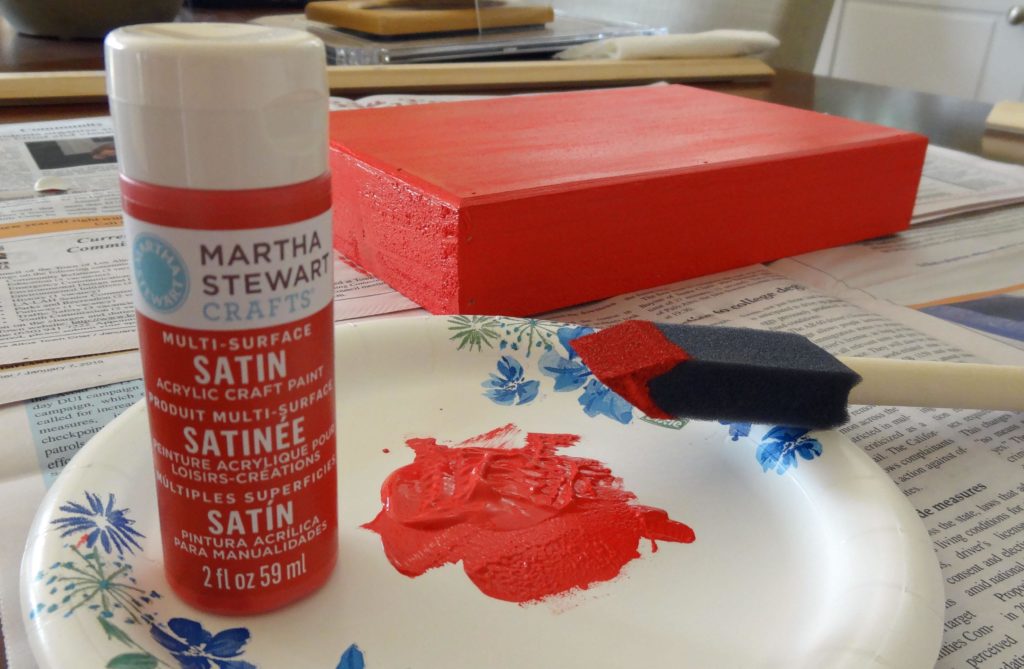
Next, use a foam brush or other paint brush to paint your wood sign. I chose to paint the entire canvas red, using some Martha Stewart craft paint. You might need two coats to get the best coverage. Just let it dry completely between coats.
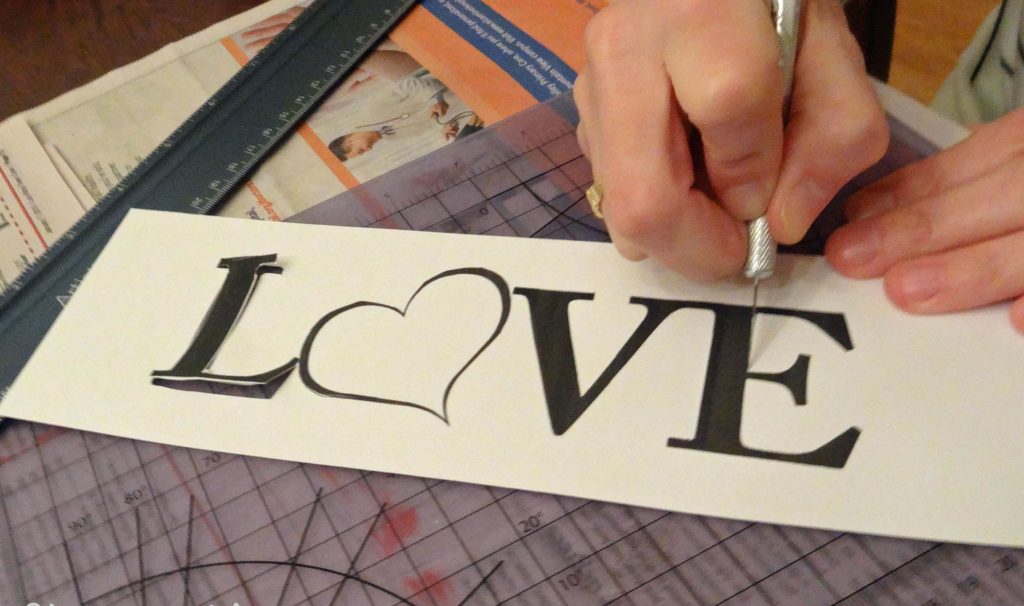
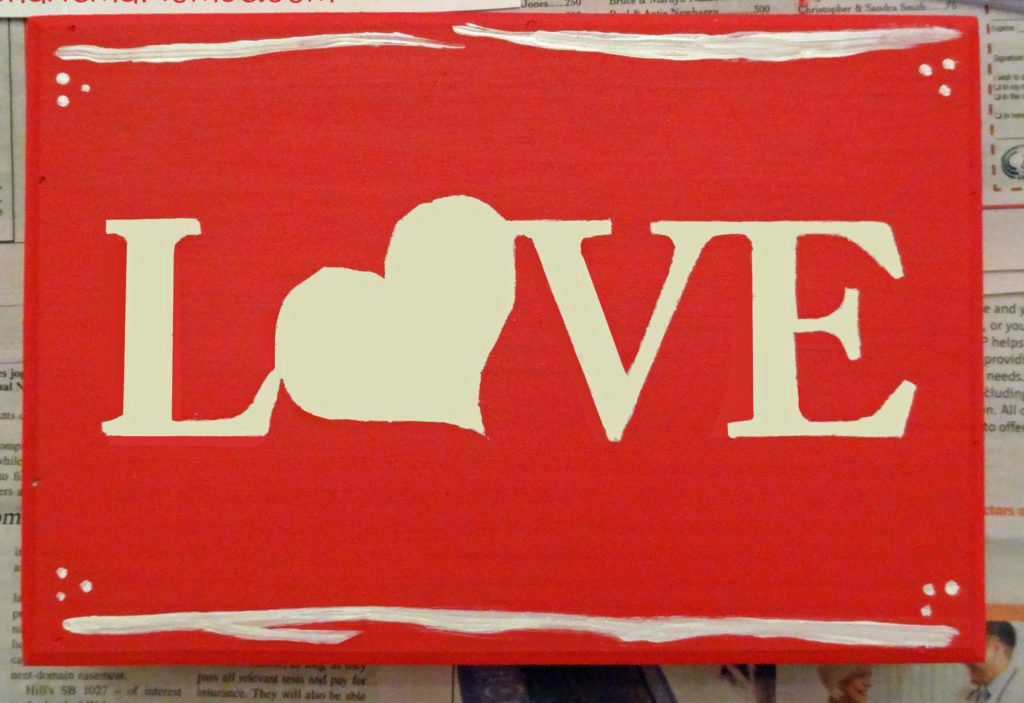
Next, you’ll want to create a stencil for your words. For the letters, I used Keynote (PowerPoint works too) to create the word ‘LOVE’ in large letters, and I added a picture of a heart in the place of the ‘O.’ I printed out my word onto some white cardstock paper. I prefer to use cardstock for stencils because I like the stiffness of it, and it holds up better to multiple coats of paint. To cut out the letters to make my stencil, I used an Exacto knife to trace and cut out the letters. Of course, you could buy stencils, and skip this step, but this method is basically free. With a nice sharp Exacto knife, making your own stencils is surprisingly easy.
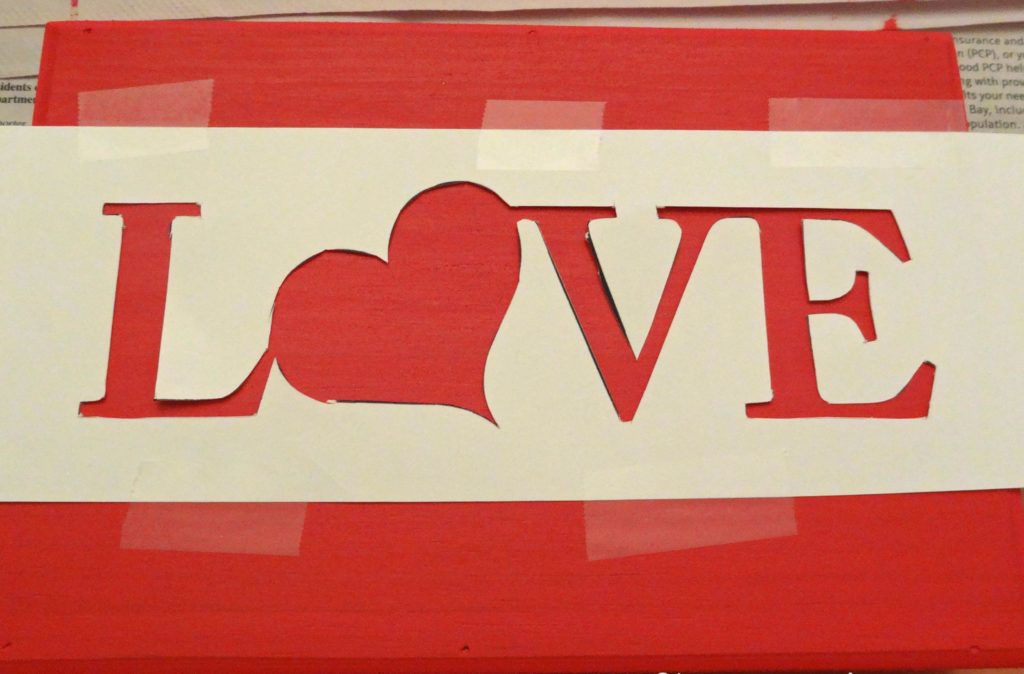
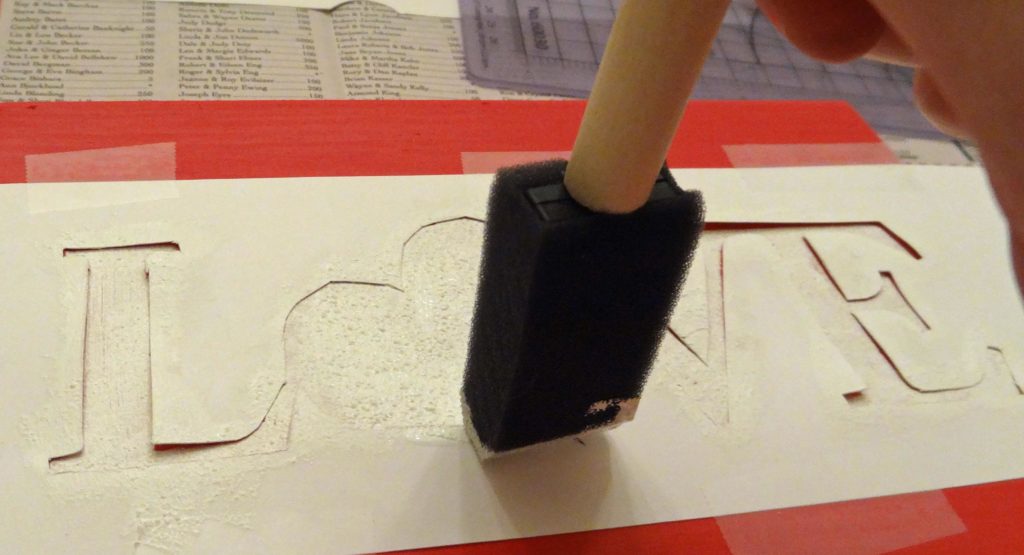
I taped my stencil to the painted wood plaque, and used a small foam applicator to paint on the letters using white craft paint. The best technique is to blot the foam applicator straight down onto the letters, rather than wiping the brush side to side. Why? Because if you wipe the brush across the letters the paint will bleed under your stencil, and the lettering won’t be quite as crisp. If you do have some paint bleed under your stencil, don’t worry…it can be fixed. Once the white letters have dried, just take a small paint brush and use your red craft paint to clean up the lines, as needed.
If you want, you can add some freehand lines/borders or other decoration with a small paint brush to finish off your Valentine’s day wooden sign. Have fun with it, and use your imagination to create the decoration however you would like. That’s the beauty of this method….you can use the same steps to create whatever you can dream up.
Favorite Products
Easy and inexpensive…that’s my kind of DIY decorating! Now that you know my super-easy process for making a DIY Valentine’s Day sign, you might be interested in a few of my favorite products. NOTE: the following list contains affiliate links, which means that if you click on the link and make a purchase, I may receive a small commission at no additional cost to you.


Leave A Comment